
Android guide · Smart Stitch
How to stitch screenshots on Android
Turn a series of chat screenshots into one readable conversation, with the repeated overlap removed.
The most important part happens before you open the app: neighboring screenshots need to contain some of the same content. SnipRoll uses that overlap to find where the images meet.
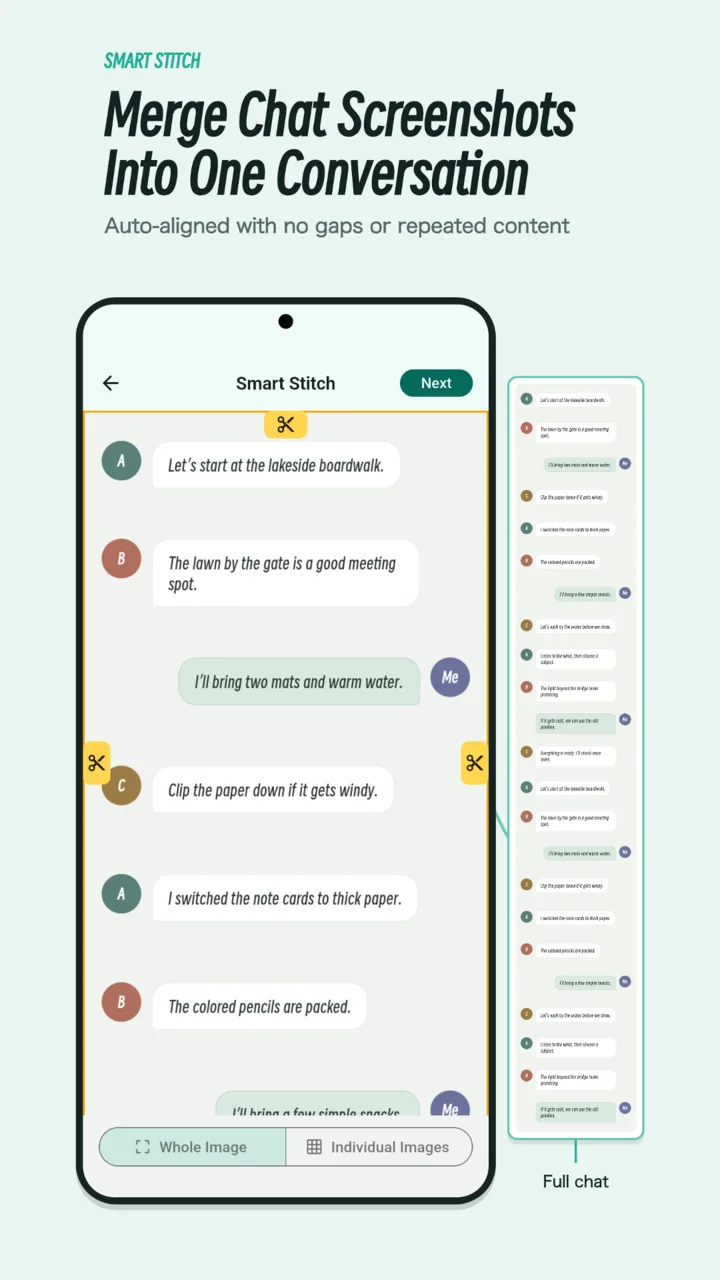
Prepare screenshots that line up
Start at the beginning of the conversation and take a screenshot. Scroll down part of a screen, leaving a few full messages visible from the previous image, then capture again. Repeat until you reach the end.
- Keep the same phone orientation, text size, and app zoom level throughout.
- Let the page stop moving before each screenshot. Try to avoid incoming messages or other content changes during capture.
- Keep the original images. Cropping or resizing each screenshot differently makes matching harder.
- Include every section you want to keep. Stitching cannot recover a message that is absent from all the source images.
For an article you can open by URL, full-page webpage capture may be a better starting point.
Select, stitch, and export
Open Smart Stitch
On SnipRoll Home, tap Smart Stitch. Select the screenshots from your photo library. If Android requests photo access, allow access to the images you want to use.
Put the conversation in order
Select the images from the first part of the conversation to the last. Check the numbered selection badges before continuing. If the order is wrong, deselect the affected images and select them again in the intended order, then tap Next.
Inspect the joins
Wait for the stitched preview. Scroll through every join and check that each message appears once, in the correct order. Look closely at text near the join rather than relying only on the overall shape of the long image.
If a position is marked as potentially imperfect, use Seams to inspect and adjust it. Adjust the crop at the join until the content is continuous. Automatic alignment is a starting point; difficult or changing content may need your correction.
Trim and protect the result
Use Whole to trim the outside edges of the combined image, or Single to adjust an individual image. Keep enough context to make the conversation understandable. Tap Next to continue to the editing tools if you need to hide private details or add an annotation.
Export and check the saved image
When the image is ready, open the Export options. Choose Save Image to save the result to your photo library, or choose Share Image to open Android's share options.
Open the saved image in your photo app and zoom into a few joins. A messaging app can compress long images when you send them, so check the received copy if small text matters.
If the stitch does not look right
- A message appears twice
- Check the image order and the crop at that seam. Repeated content usually means the overlapping area was not fully removed.
- A message or a line is missing
- Compare the two original screenshots around the join. Restore the relevant area by adjusting the seam. If the message is absent from both originals, take another screenshot covering the gap.
- The content shifts sideways or changes size
- Check whether the screenshots came from different zoom levels, orientations, or edited copies. Use a consistent sequence of originals where possible.
- There is no reliable overlap
- Capture again with more shared content between neighboring images. Repeating wallpaper or blank space gives less useful alignment evidence than several distinct lines of text.