
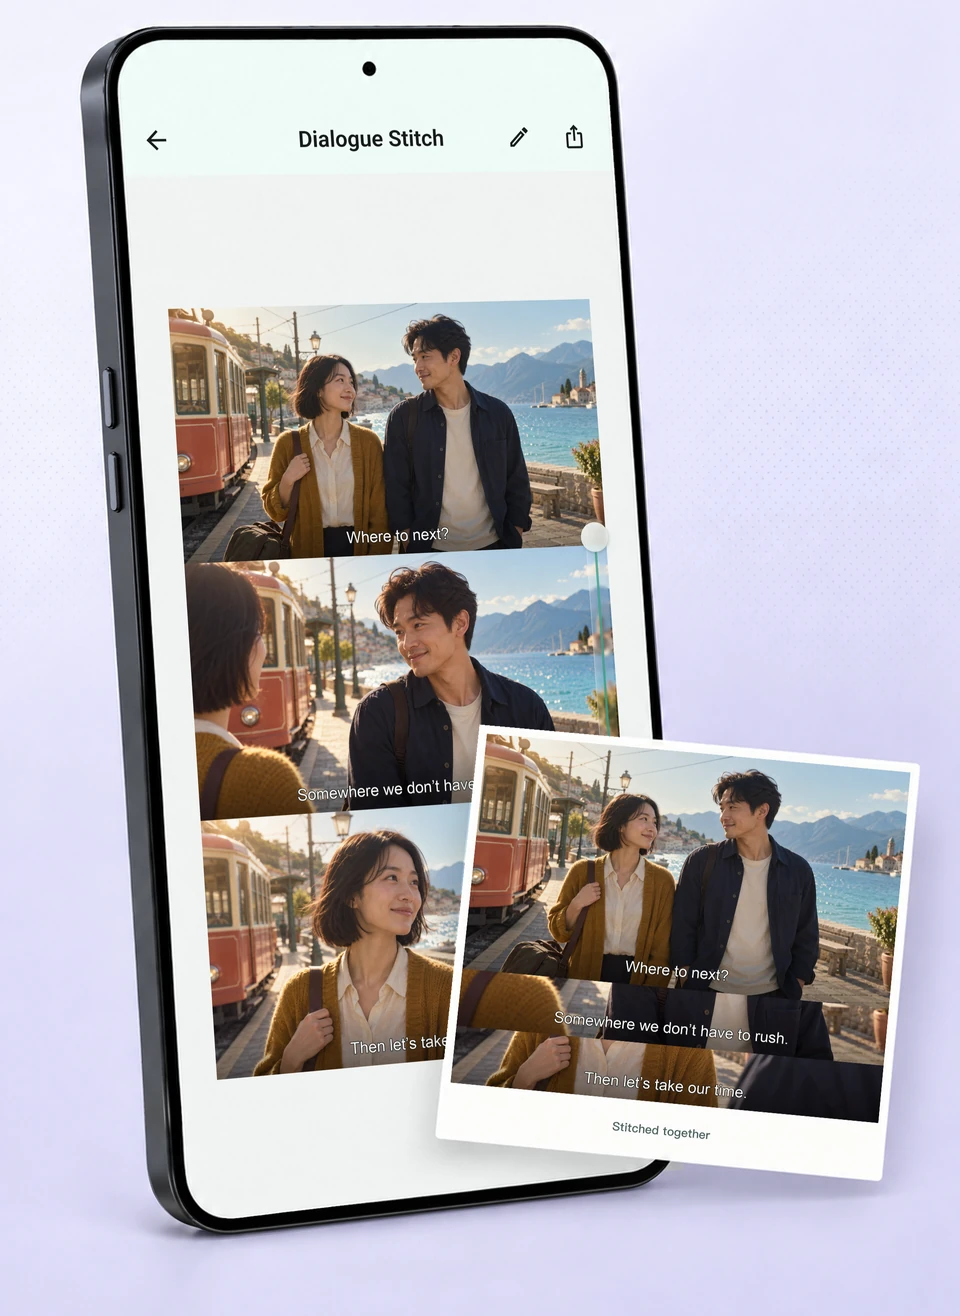
Before you start
Capture one screenshot for each new line of dialogue. Wait for the complete subtitle to appear and the playback controls to disappear.
- Keep the same orientation, player size and subtitle settings.
- Choose a first frame that gives the scene context; it stays as the full opening image.
- Leave room for two-line subtitles and use content you are allowed to capture and share.
Step by step
Open Dialogue
Choose Dialogue on Home and select your screenshots, beginning with the main scene and following the order of the lines.
Check the sequence
Review the numbered selection badges and remove duplicates. Correct the order by deselecting and reselecting frames, then tap Next.
Adjust the subtitle strip height
Drag the translucent vertical control on the right. It adjusts the amount of the bottom of later frames that remains visible. Leave enough room for every subtitle and a little breathing space.
Read from the first scene to the last line
The same control applies to the later frames together. Check the tallest two-line subtitle, the reading order, and every strip. Increase the visible height if letters are cut off.
Export your dialogue collage
Use Export to save the result, or continue with Next to the editor for annotations and other finishing touches. Check the saved text at normal reading size; fewer lines per collage can help when a sharing app compresses the image.
If it needs a little adjustment
The top line is cut off
Increase the visible strip height until the tallest subtitle fits. Frames with subtitles at similar heights work best together.
Too much of the scene repeats
Reduce the strip height gradually, stopping before the crop reaches the letters.
A frame has different-sized text
Check the original dimensions and player zoom. Use consistently captured frames rather than mixing orientations and resized images.